Hp Easy Scan Not Finding My Scanner
Z7_3054ICK0KGTE30AQO5O3KA30N0
hp-concentra-wrapper-portlet
![]() Actions
Actions
HP ScanJet - Error messages display on the scanning software in a Citrix environment
Issue
When scanning using an HP software or any third-party software published from XenApp or XenDesktop 7.6, the scanning software displays an error message indicating that a scanner cannot be found.
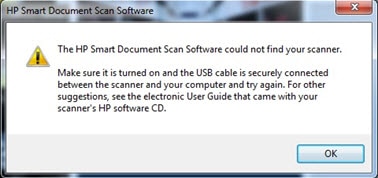
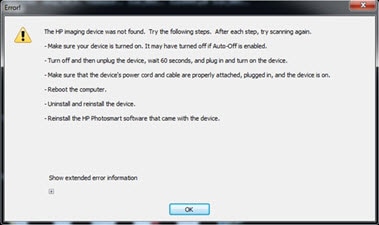
Examples of scanner error messages in a Citrix environment are the following:
-
HP Smart Document Scan Software could not find your scanner.
-
HP ScanJet Pro 2500fl1 Flatbed Scanner was not found.

-
Scanner not connected.

-
HP imaging device was not found.
Workaround
Follow these steps to resolve the issue:
-
Check to see if the scanner's physical connection is set up correctly.
-
Install a corresponding TWAIN driver on the Virtual Machine (VM) in XenCenter or the physical machine.
-
Select Software and Drivers.
-
Type your product number in the text box, and then click Find my product.
-
Select your operating system.
-
Select the Driver - Product Installation Software section, and then select the TWAIN driver.
-
Install the Citrix Receiver on the client's personal computer (PC).
-
Check if the Windows Imaging Application (WIA) service is enabled on the client's PC and the VM.
-
On your operating system, click Start, select Control Panel.
-
Select Administrative Tools, and then select Services.
-
Make sure that the status for the Windows Imaging Application service is "Started".
-
-
Install the basic scanner driver (WIA) on the client's PC.
-
Note the Product ID (PID) and Vendor ID (VID) of the scanner in Device Manager. These values are required to create a new registry key.
-
Open Device Manager and check the USB device that needs to be redirected.
-
Right-click the device and select Properties.
-
Click the Details tab, and then complete the following tasks:
-
In the Property drop-down list box, select Hardware Ids.
-
In the Value section, note the PID and VID values.
Figure : Locate the PID and the VID

-
-
-
Configure USB redirection in the Citrix Studio.
Refer to your Citrix user guide to enable USB redirection.
-
Open the Registry Editor to create a new registry key.
-
Click Start, select Run, type the command "regedit", and then press Enter to open the Registry Editor.
-
Depending on your Windows operating system, locate Devices in the following subkey:
-
For 32 bit operating system: HKEY_LOCAL_MACHINE\SOFTWARE\Citrix\ICA Client\GenericUSB\Devices
-
For 64 bit operating system: HKEY_LOCAL_MACHINE\SOFTWARE\Wow6432Node\Citrix\ICA Client\GenericUSB\Devices
-
-
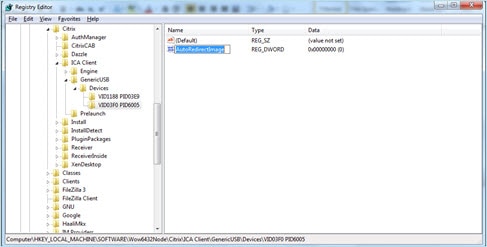
Click Devices, right-click AutoRedirectImage in the right pane, and then select Modify.
-
On the Edit DWORD window, type "1" in the Value data text box.
-
Right-click Devices, select New, and then select Key.
-
For the new key name, type the PID and VID values.
Figure : Rename the register keys

-
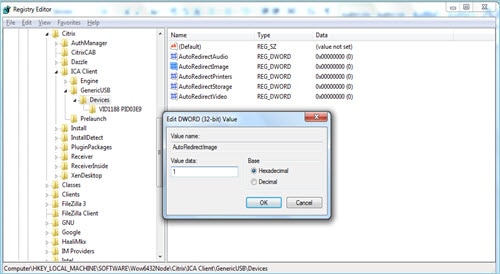
Right-click the right pane of the window, select New, and then select DWORD.
-
For the DWORD value name, type "AutoRedirectImage".
Figure : Rename DWORD
-
Right-click AutoRedirectImage in the right pane, and then select Modify.
-
On the Edit DWORD window, type "1" in the Value data text box.
Figure : Edit DWORD value
-
-
Open the Local Group Policy Editor on the client's PC to add Citrix Administrative Templates.
-
Click Start, select Run, and then type the command "gpedit.msc" to open the Local Group Policy Editor.
-
In the left pane, right-click Administrative Templates, and then select Add/Remove Templates.
-
On the Add/Remove Templates window, click Add.
-
To add a file to the template, browse to the following location: \Program Files\Citrix\ICA Client\configuration\en\icaclient_usb.adm, and then open the icaclient_usb.adm file.
-
Close the Add/Remove Templates.
-
-
Edit the Generic USB Remoting setting.
-
In the Local Group Policy Editor, browse to the following location to select Generic USB Remoting:
Administrative Templates\Classic Administrative Templates\Citrix Components\Citrix Receiver\Remoting client devices\Generic USB Remoting .
-
In the right pane, on the Setting tab, click the USB Device Rules.
Figure : Generic USB Remoting

-
In the USB Device Rules window, complete the following tasks:
-
Click to select the Enabled check box.
-
Type the PID and VID values of the scanner in the USB Device Rules section.
-
Click Apply, and then click OK.
Figure : USB Device Rules

-
-
In the Existing USB Devices window, complete the following tasks:
-
Click to select the Enabled check box.
-
Select one of the following options in the When desktop starts drop-down list box:
-
Display message and let user choose.
or
-
Connect all available USB devices.
-
-
Click Apply, and then click OK.
Figure : Existing USB Devices

-
-
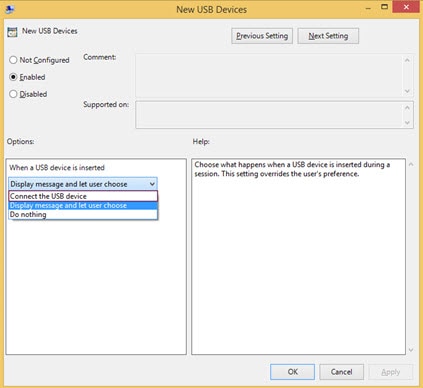
In the New USB Devices window, complete the following tasks:
-
Click to select the Enabled check box.
-
Select one of the following options in the When a USB device is inserted drop-down list box:
-
Display message and let user choose
or
-
Connect the USB device.
-
-
Click Apply, and then click OK.
Figure : New USB Devices
-
-
In the USB Devices List in Desktop Viewer, complete the following tasks:
-
Click to select the Enabled check box.
-
Click Apply, and then click OK.
Figure : USB Devices List in Desktop Viewer

-
-
-
Restart the client's PC or scanner, and then check to see if the scanner is available.
note:If the scanning software is unable to detect a scanner after completing the above steps, disable the TWAIN redirection to try scanning again, OR, contact HP Support.
Affected Scanners
This issue occurs for the following scanners:
-
HP ScanJet Pro 2000 s1 Sheet-feed Scanner
-
HP ScanJet Pro 2000 s2 Sheet-feed Scanner
-
HP ScanJet Pro 2500 f1 Flatbed Scanner
-
HP Scanjet Pro 3000 s2 Sheet-feed Scanner
-
HP Scanjet Pro 3000 s3 Sheet-feed Scanner
-
HP Scanjet Pro 3000 s4 Sheet-feed Scanner
-
HP ScanJet Pro 3500 f1 Flatbed Scanner
-
HP ScanJet Pro N4000 snw1 Sheet-feed Scanner
-
HP Scanjet Enterprise Flow 5000 s2 Sheet-feed Scanner
-
HP Scanjet Enterprise Flow 5000 s3 Sheet-feed Scanner
-
HP Scanjet Enterprise Flow 5000 s4 Sheet-feed Scanner
-
HP Scanjet Enterprise Flow 5000 s5 Sheet-feed Scanner
-
HP Scanjet Enterprise 7000 s2 Sheet-feed Scanner
-
HP Scanjet Enterprise Flow 7000 s3 Sheet-feed Scanner
-
HP ScanJet Enterprise Flow N7000 snw1 Sheet-feed Scanner
-
HP Scanjet Enterprise 7500 Flatbed Scanner
-
HP Scanjet N6350 Networked Document Flatbed Scanner
-
HP Scanjet N9120 Document Flatbed Scanner
Source: https://support.hp.com/us-en/document/c05096864
0 Response to "Hp Easy Scan Not Finding My Scanner"
Post a Comment